Project Type Setup
Project Type defines the scope of work that is required to create a Project. Use any of the existing Project Type templates, or create a new custom Project Type. Each Project Type can have specific attributes. Project Type attributes define project details that will be associated to a project according to the selected Project Type.
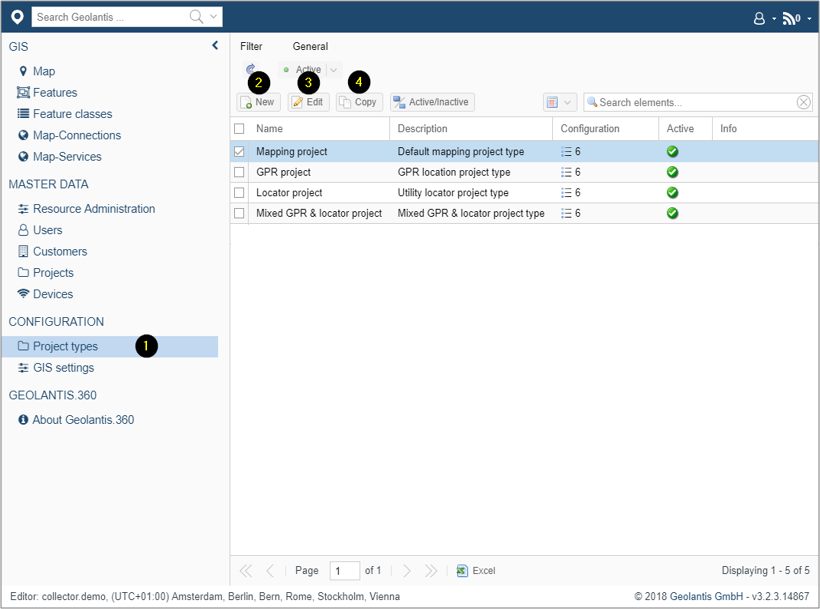
- Go to the Project-Types page
- Click New to create a custom project type
- Click Edit to change project type configuration
- Click Copy to duplicate and customize existing project type
Project Type Advanced Configuration
Starting from web version 17.4.7 (09.2022)
Instead of having all existing Feature-classes listed for the field users in the earlier versions of Geolantis.360, the new Project-Type workflow enables the project manager to easily select from a wide range of existing catalog only the needed Feature-classes and assign them to be used in a project for data collection or inspection.
This improvement of Project-Type setup not only optimizes the use of Feature-classes, but also helps in adjusting the GPS-Accuracy settings per Project.
Here are some examples to explain how different Feature-Class in the same Project could be configured with a specific GPS-Accuracy to seemingly achieve the anticipated workflow:
| Scenario | Description | Affected Feature class | Accuracy requirements |
| Field notes | Only a few items to take notes should be visible in the feature class selector | Notes text layer | 2-3[m] range |
| Utility data collection | Used for mapping utility assessments | Utilities point layer | Centimeter level, typically 1-10[cm] |
| Damage assessment | Assess damages – some feature classes to capture damages or take photos should exist | Damage point layer | Meter level |
| Mapping water networks | Only feature classes related to water network mapping should be presented to the field user | Water network line | Centimeter level |
The following steps show how Project-Type can be simply configured:
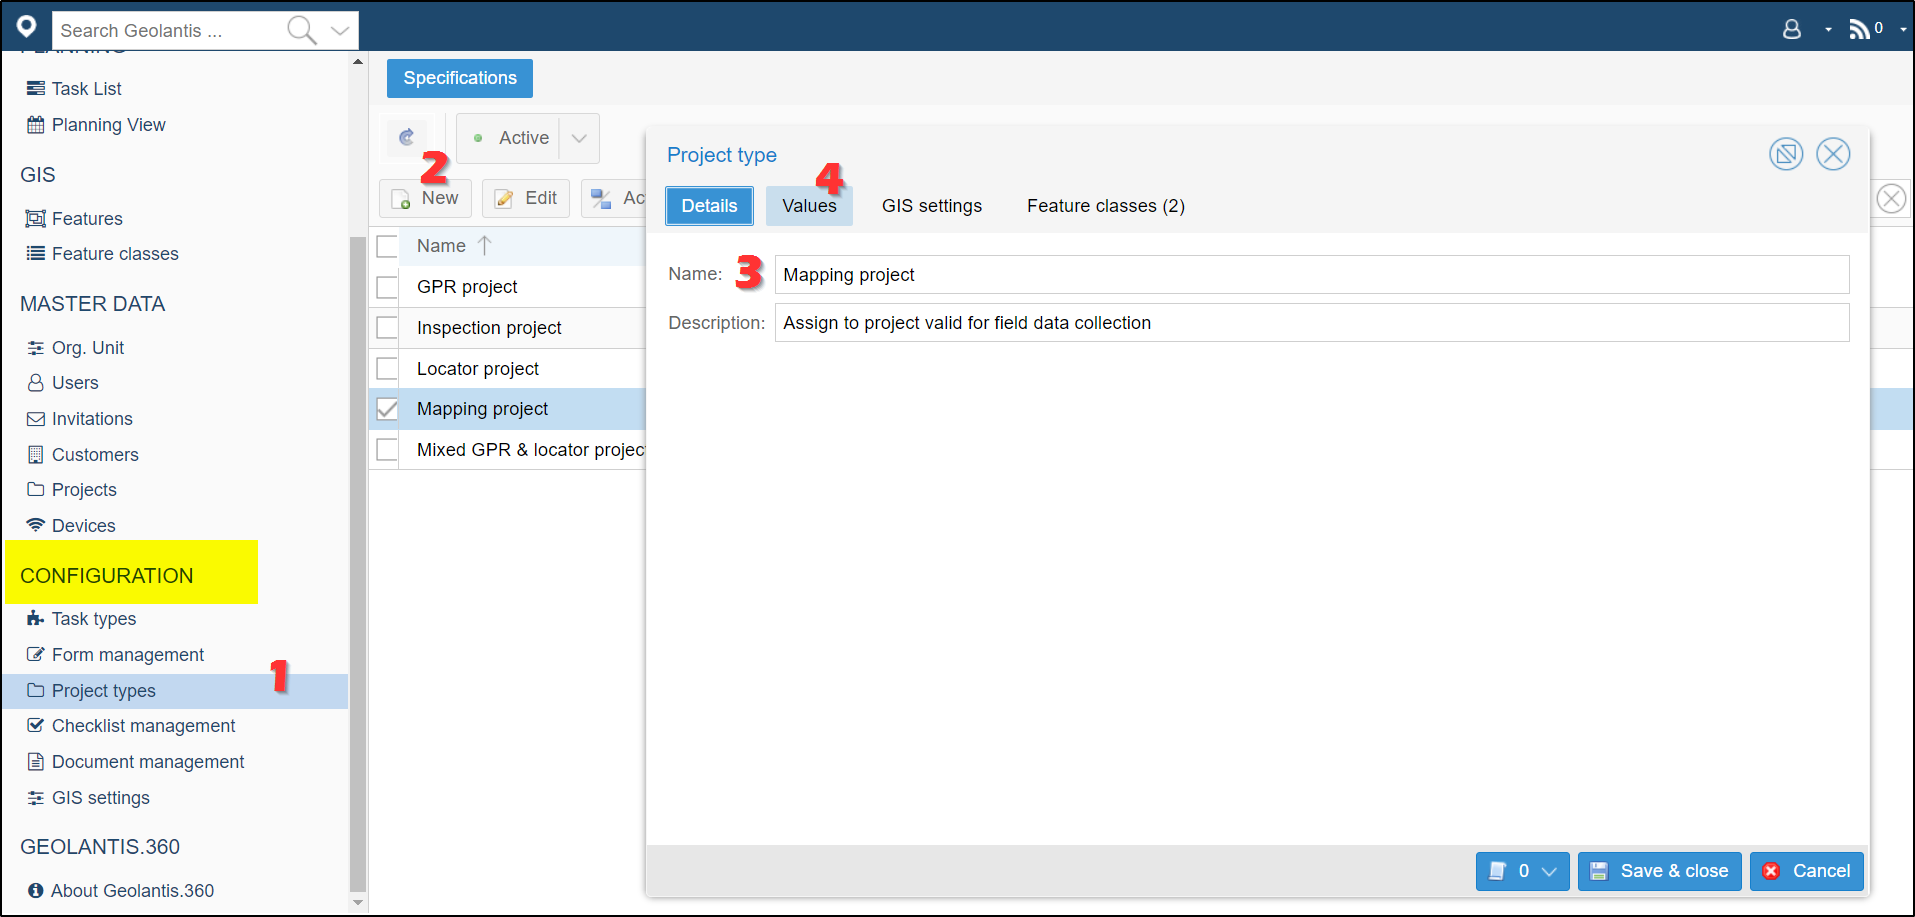
- On the left side panel, go to the Project-Types page under the Configuration section
- Click on New to add a new project type
- Add a name and optionally description for the project type
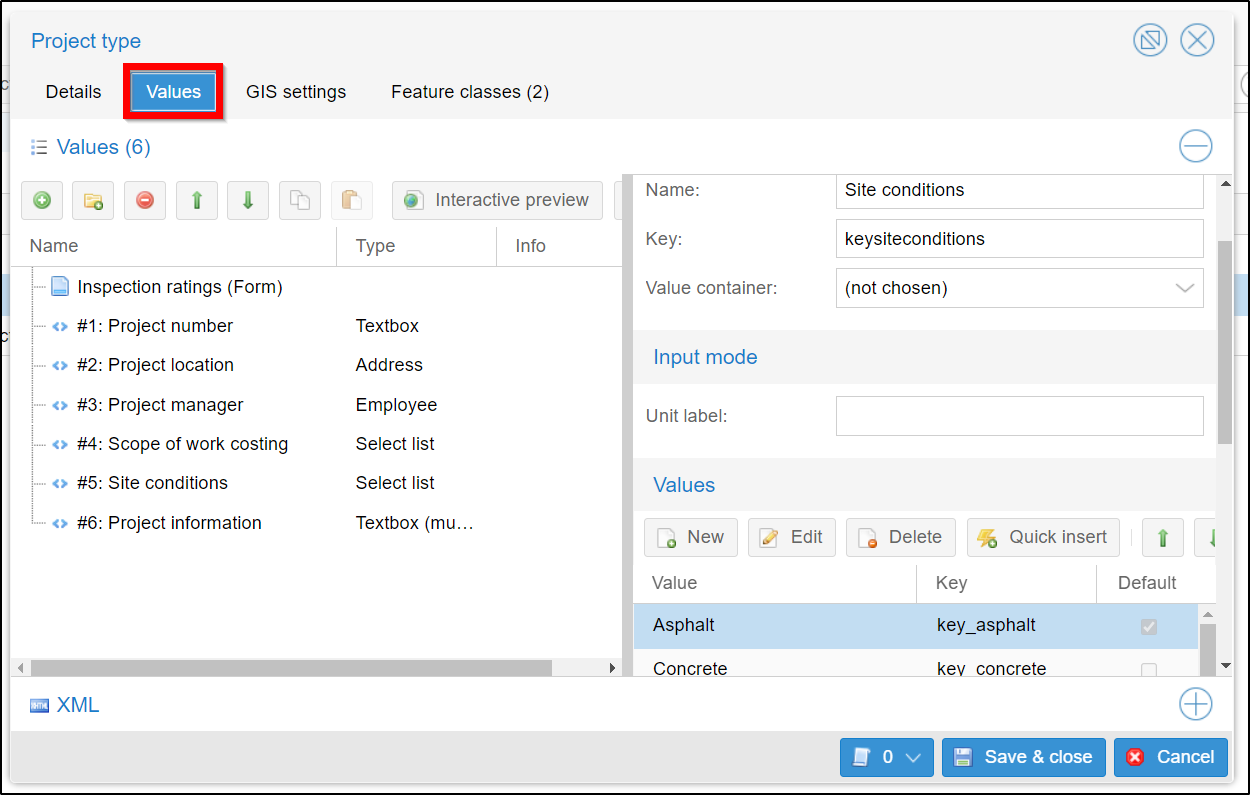
- Optional: add custom attributes to add more refined project metadata

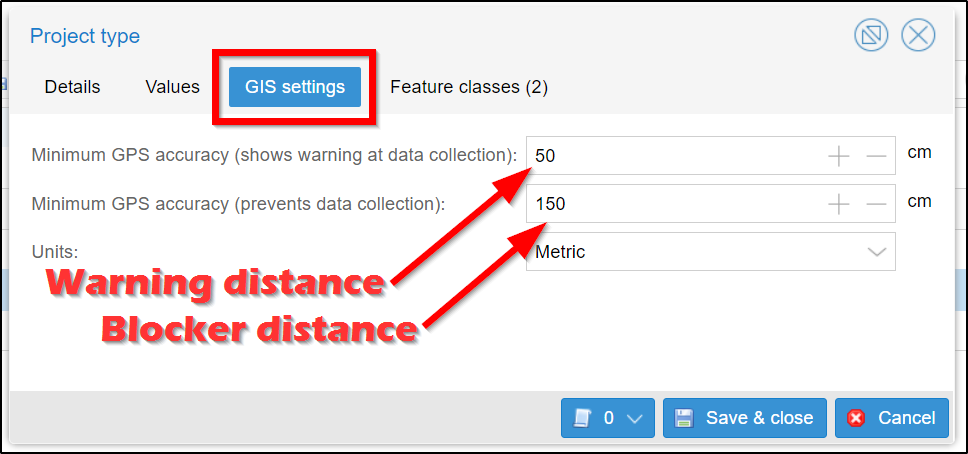
- Optional: define custom GPS accuracy settings to override the default ones. This setting allows to setup the data collection accuracy thresholds as explained in the table below:
Green
Confidence level
Data is directly capturedOrange
Warning level
App asks field user if data should be storedRed
Blocker level
App do not allows to capture data (except placing manually)Switch to the GIS-Settings tab to set the value of a warning and blocker threshold in centimeters to force a specific data collection accuracy.

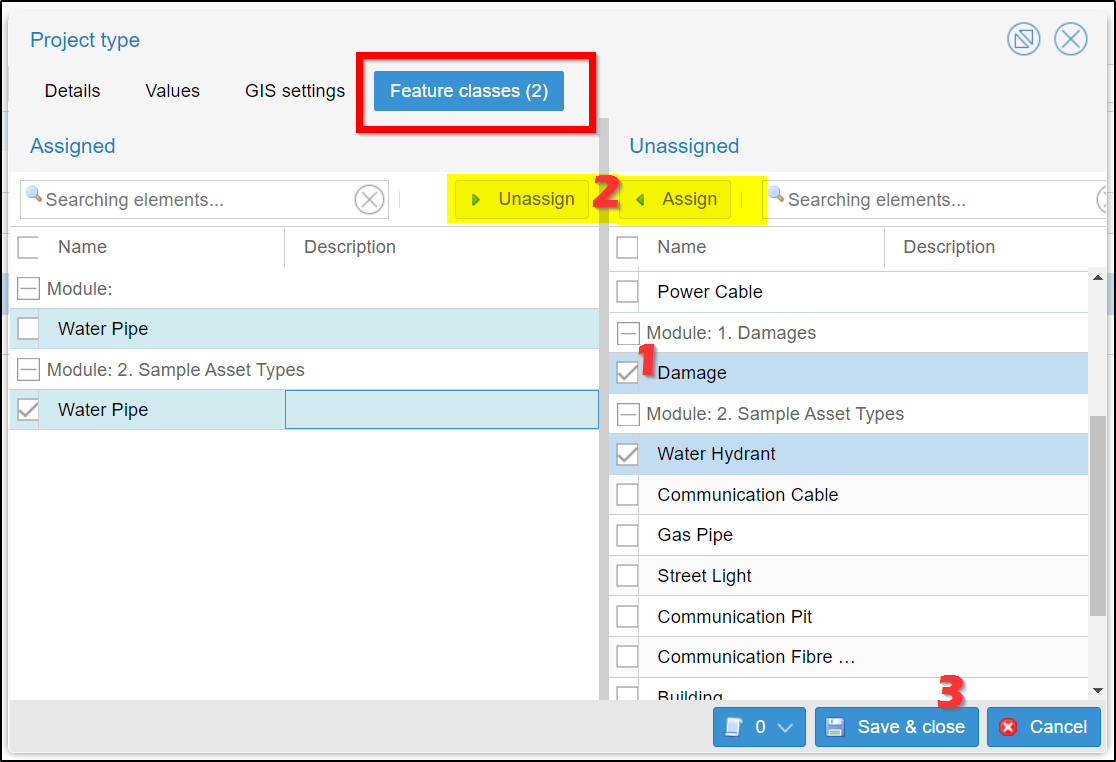
- Assign feature classes to the project type:
Switch to the Feature-Classes tab to assign one or multiple feature classes by selecting as many items as needed from the right side list and click on the Assign button. In order to remove a feature classes, select one or multiple feature classes from the left side list and the Unassign button, then click on the Save button.
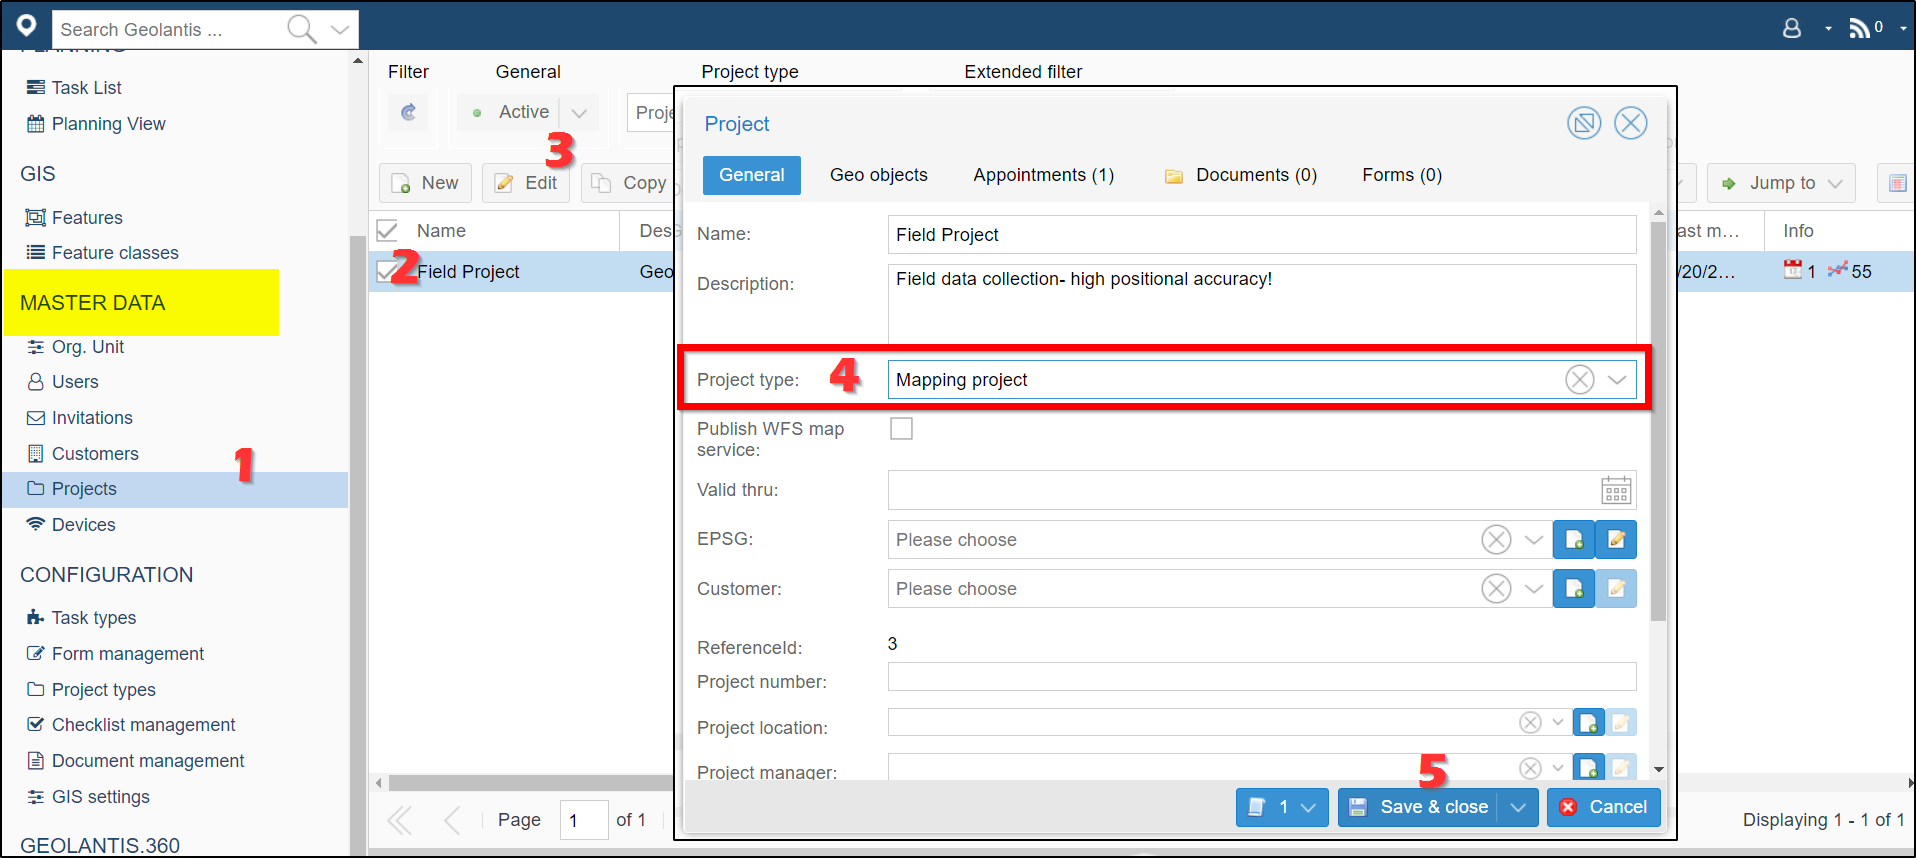
- Assign project type to project:Go to the Projects page under the Master Data section from the left side panel
Create or select a project
In the project editor window select a valid pre-configured a project type from the list
The Project-Type configuration will apply to the upcoming new features created using Geolantis.360 mobile app.