Dispatching tasks from Geolantis.360 to field workers requires the following configuration to be considered at first:
- Task Form setup
- Create new sub-task features
- Assigning existing sub-task features
- Creating task orders
- User configuration
- Task verification
Task Form Setup
In the Form Management page, associated form to a specific Task Type must be configured properly.
- Choose Form type as Task Form
- Task Type must be similar to the chosen Task Type when creating a new task (e.g. Admin-Job Setup)
- Affected feature classes must be linked to the form
- Choose single or multiple feature classes
- Save form configuration
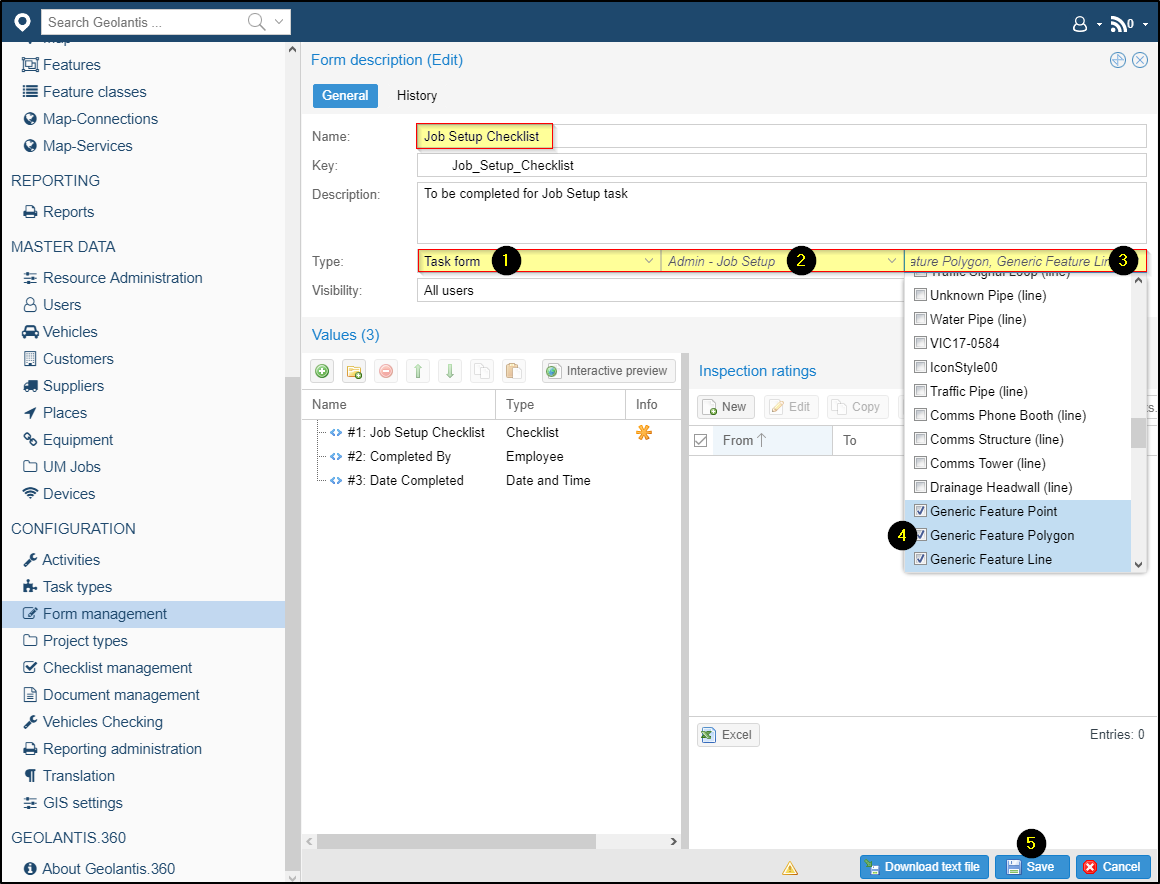
For tasks containing multiple sub tasks, additional task forms can be configured for other feature classes separately (e.g. Utility Survey Area)
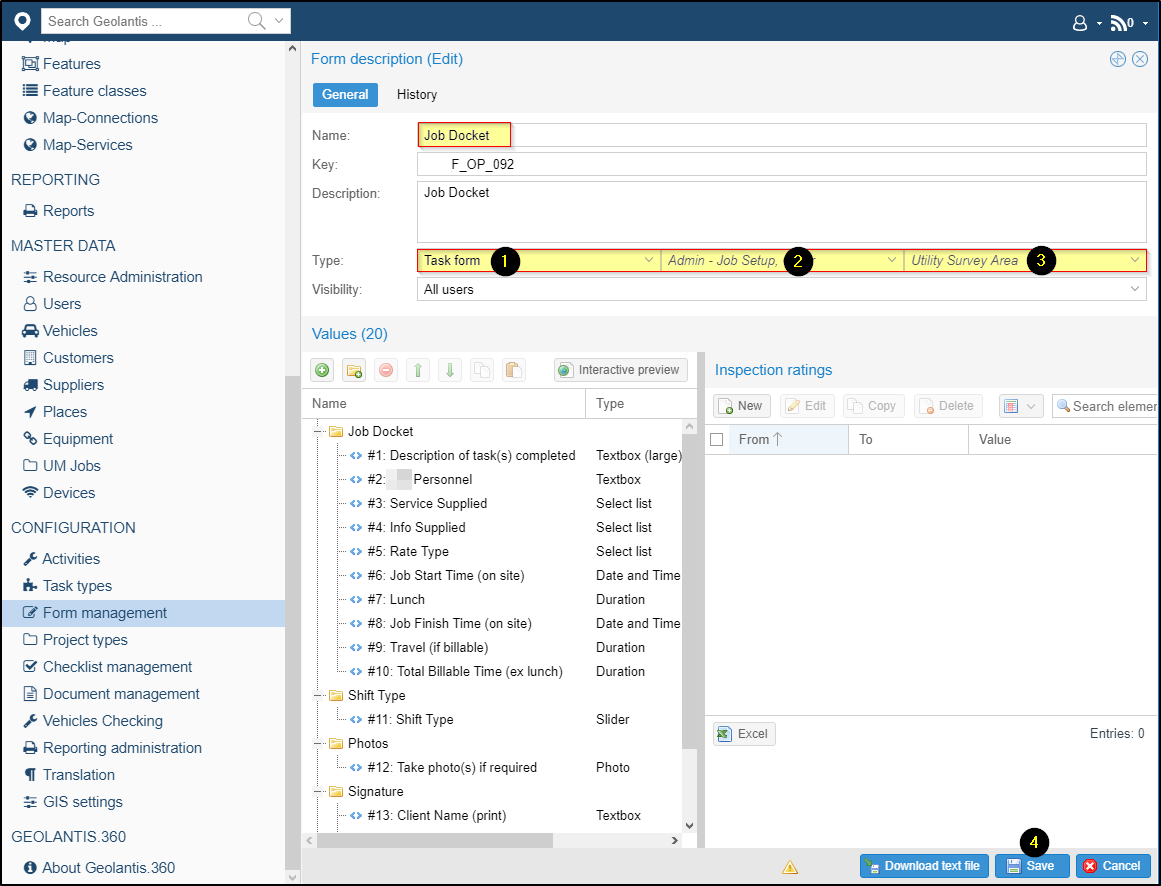
Configure the associated form to desired Task Type as follows:
- Choose form type as Task form
- Task Type must be similar to the chosen Task Type when creating a new task (e.g. Admin-Job Setup)
- Affected feature classes must be linked to the form. For example, choose Utility Survey Area feature class
- Save form configuration
Create new subtask features
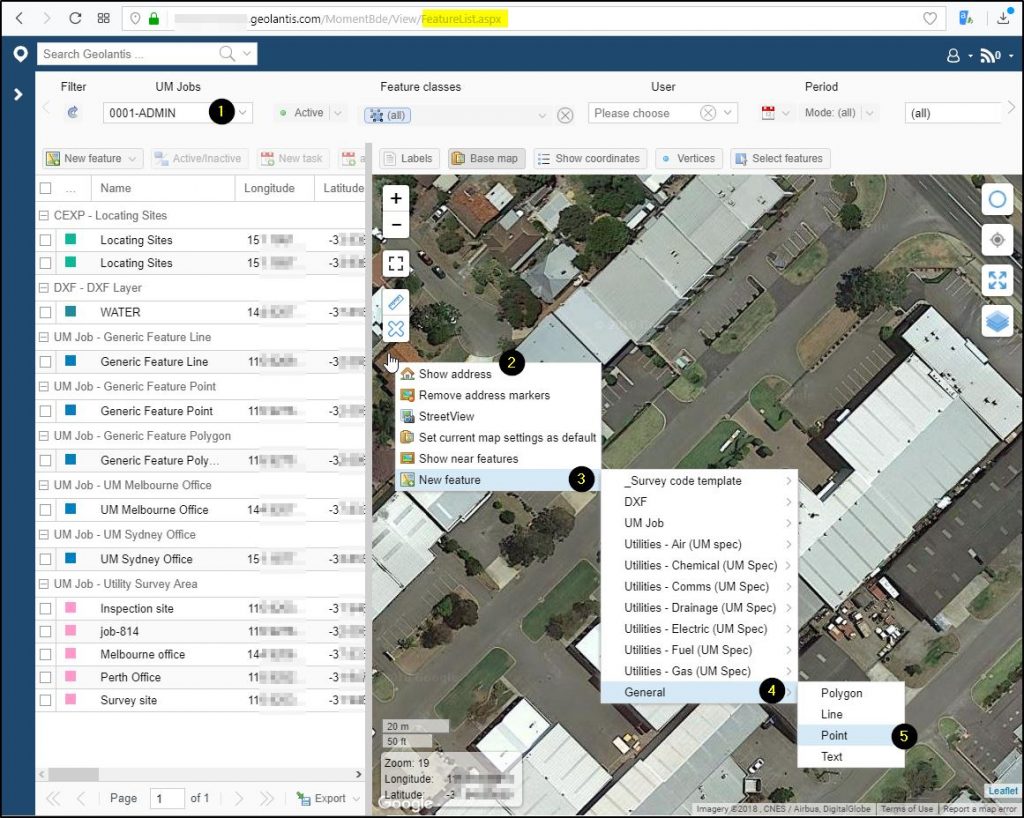
In Features List page, define a location for work area where the subtask features should be located:
- Select Project
- Right click on the map and use the Show address option to type the targeted location for the field survey (e.g. Perth Industrial Center PTY Ltd)
- Find the desired location and right click on the map to use the New Feature option
- Choose General from the list
- Select the feature type to create Work Area Polygon, or generic features Line/Point
Geolantis.360 enables authorized manager users to assign inspection tasks to be completed by field surveyors within a specific geofencing work area boundary. To create a new work area use the new feature option by right-clicking on the map section in the Features List page, or by clicking on the New feature button above the map section in the new Features page.
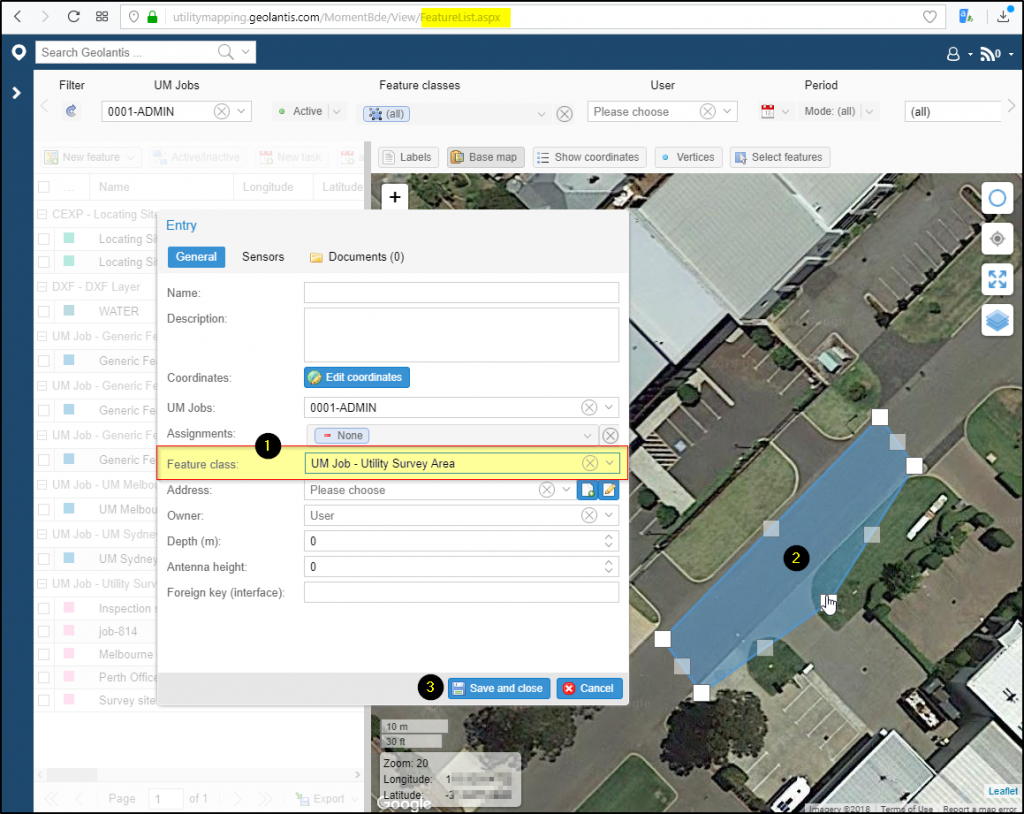
- In the feature pop up window select feature class. Choose Utility Survey Area for work area, or any other feature class (generic feature) for additional subtask features Move the markers on the map to draw the survey area
- Click on the map to add more markers
- Save and close
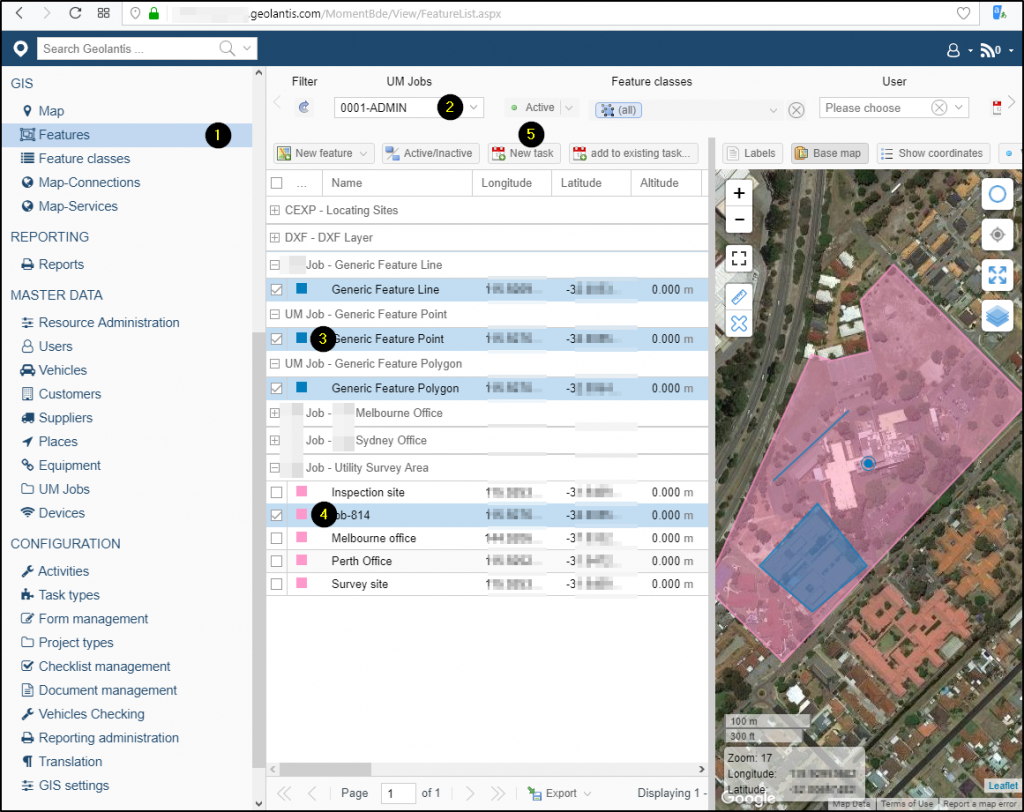
Assigning existing subtask features
- Go to Features List page
- Choose a project (can be specified during task creation)
- Select targeted feature(s)
- Click New Task to assign the selected feature(s) to a new task
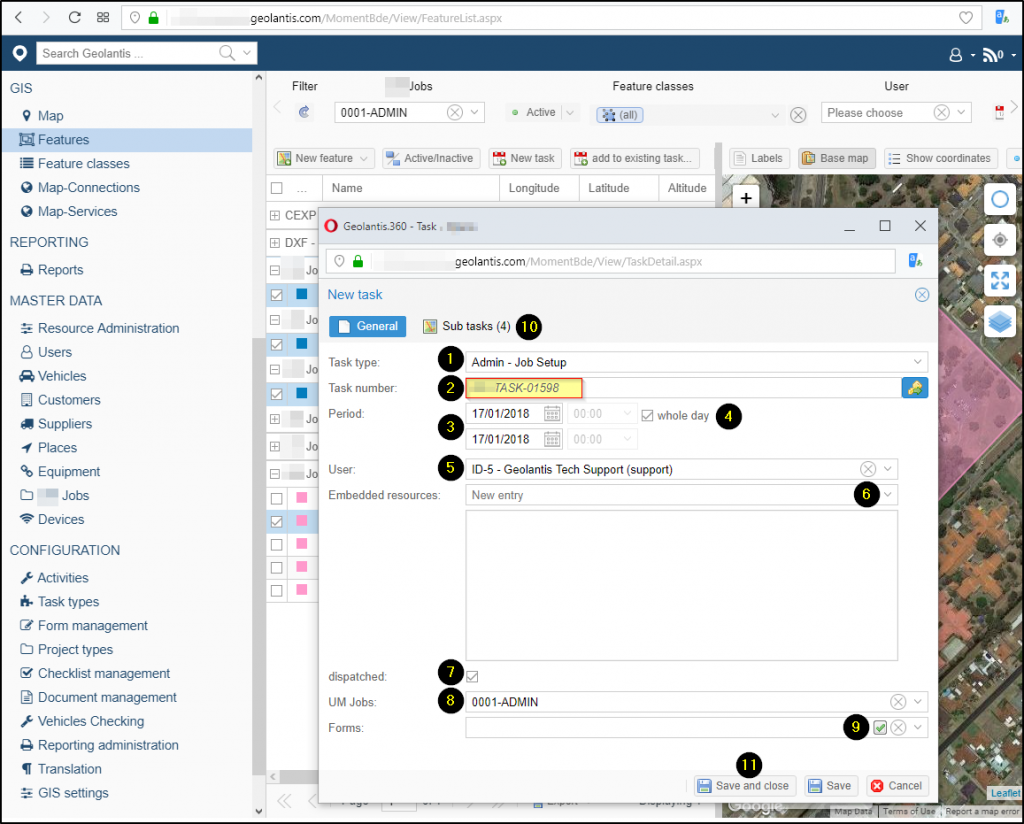
Creating task orders
In the Task window, fill in General task configuration
- Select Task Type (as specified in Form configuration)
- Note the auto-generated number of the task that will be dispatched to assignee user in the field app
- Specify task duration
- Uncheck whole day to choose a specific time
- Select User (assignee user must be mobile active)
- Select embedded resources/users (optional)
- Check Dispatched to send a task to the mobile user
- Select Project
- Check Forms to include pre-associated forms, additional forms can be selected for certain tasks
- Verify selected features as Subtasks (optional)
- Save and Close
User configuration
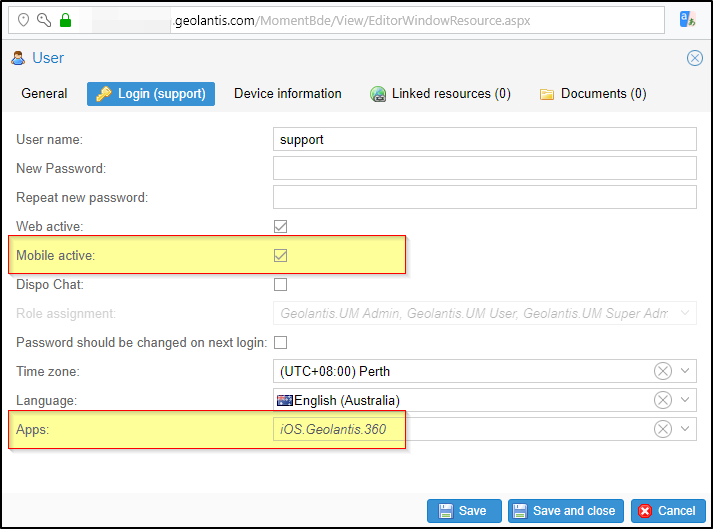
Task assignee user must be Mobile active and enabled to access the field App to complete tasks.
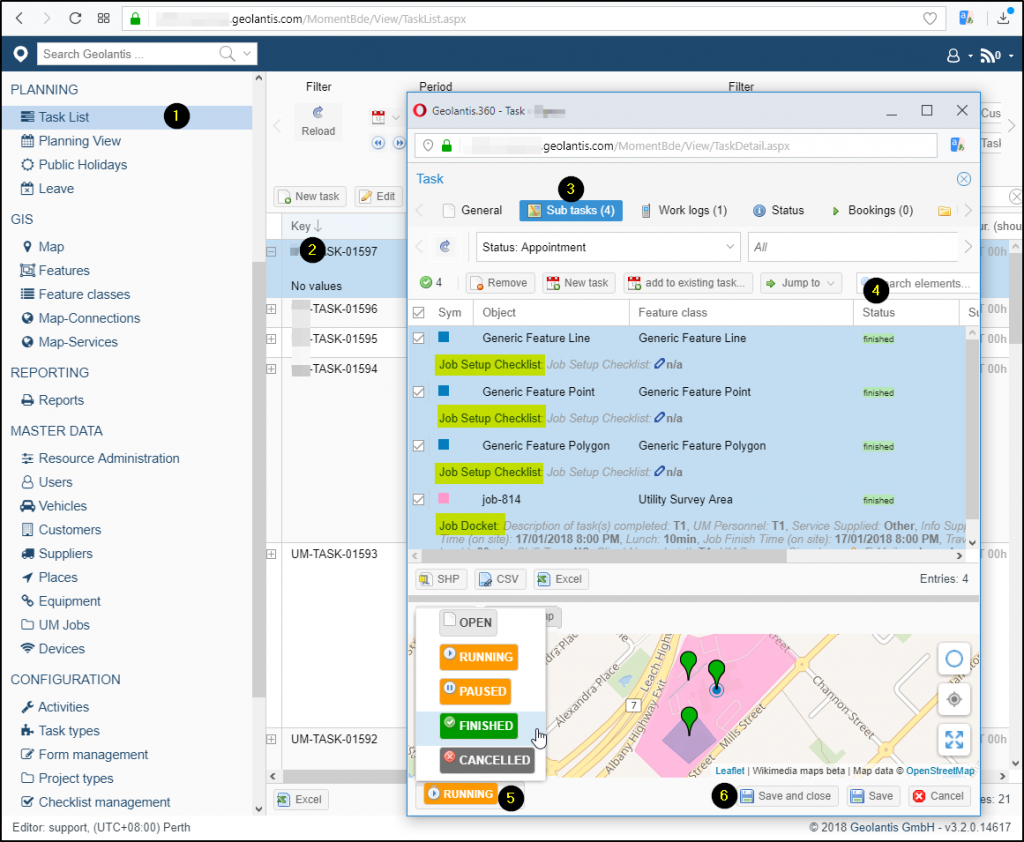
Task verification
When a task is completed in the field by the task assignee user, the status of assigned subtask can be reviewed and altered in the task details window. The task will remain running if there are unfinished subtasks. All the open subtask orders must be completed and submitted so that the overall task can be finished.
To verify and complete tasks:
- Go to Task List page
- Select a task, and double-click or click the Edit button above
- Switch to Subtasks tab
- Ensure that all included subtasks have the status ‘Finished’ (all markers on the map are green)
- Change the overall task status to ‘Finished’