Creating New Projects
- Use the Projects page to create and configure projects
- Select one of the existing Project Type Templates
- Select an existing customer or create a new customer (optional)
- Define project coordinates system by choosing EPSG
- Choose project validity (optional)
- Choose relative Org. Unit to restrict the users to only have access to a projects in their Org. Units
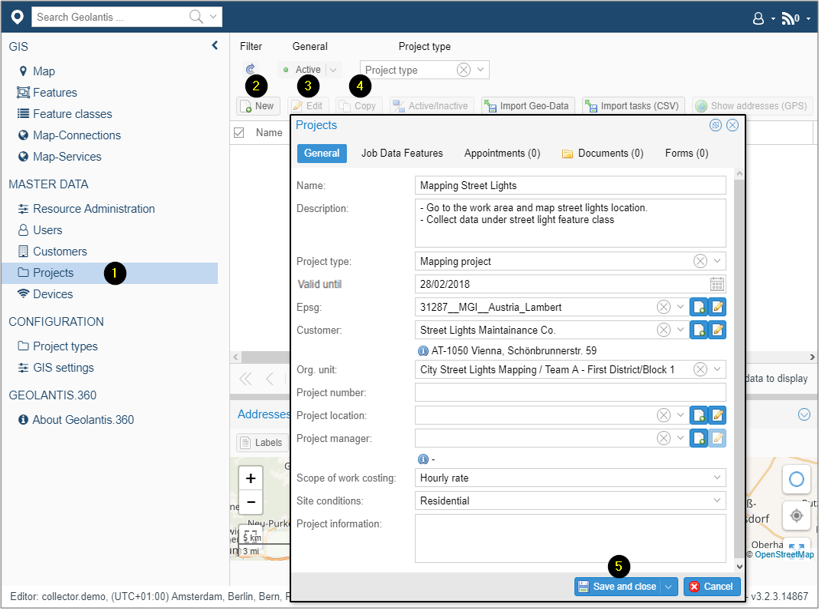
- Go to the Projects page
- Click New to create a project
- Click Edit to modify an existing project
- Click Copy to duplicate and customize existing project
- Save and Close
Configuring Project EPSG spatial reference?
- In project configuration window, choose one of the existing EPSG templates, or create a new standard EPSG profile.
- If the desired EPSG template is not included in the templates list, find standard EPSG profile at http://epsg.io and paste it in the EPSG Value field, then enter profile name in the Key field.
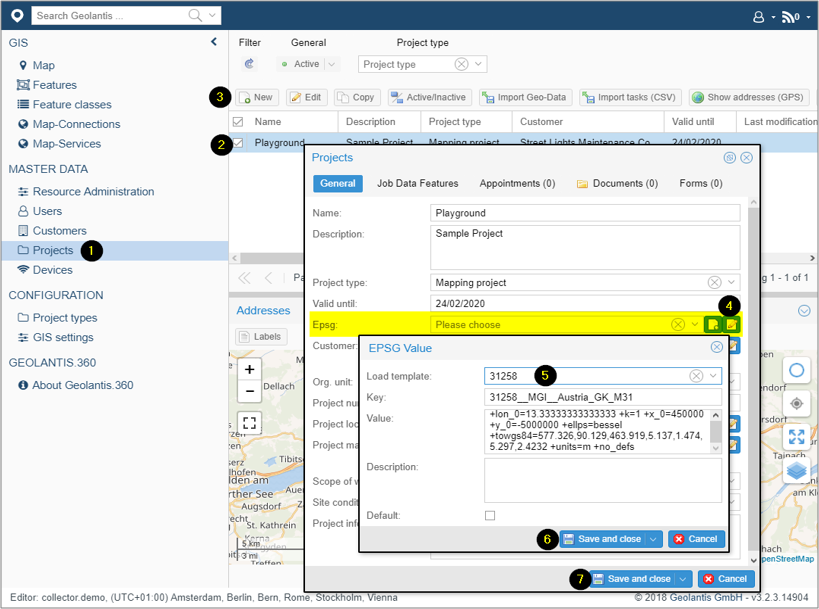
- Go to the Projects page
- Select project and click Edit, or
- For new projects, click New
- In the project window, go to EPSG filed and click the load icon
 , or click the add icon
- In the EPSG Value window, write standard EPSG code.
- When the EPSG template is loaded, Save and close the EPSG Value window
- Save and close the Project window
Managing Projects
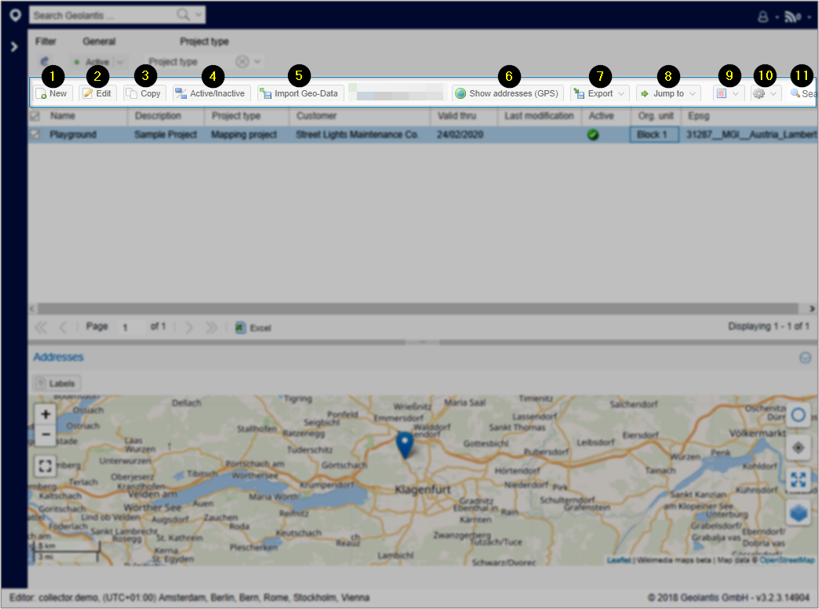
- Click New to create a project
- Click Edit to configure an existing project
- Click Copy to duplicate and adjust existing project
- Activate/Inactivate project*
- Import project Geo-Data for updating external maps
- 6.Display project location on the map view at the lower panel. For this option, at least one features should be recorded using the field app
- Export selected project to Shapefile/CSV/DXF/KML
- Display project data in Features or Map page
- 9.Apply bulk changes to multiple selected projects
- Use the search bar to find a specific project (write at least 3 characters to activate the search option)
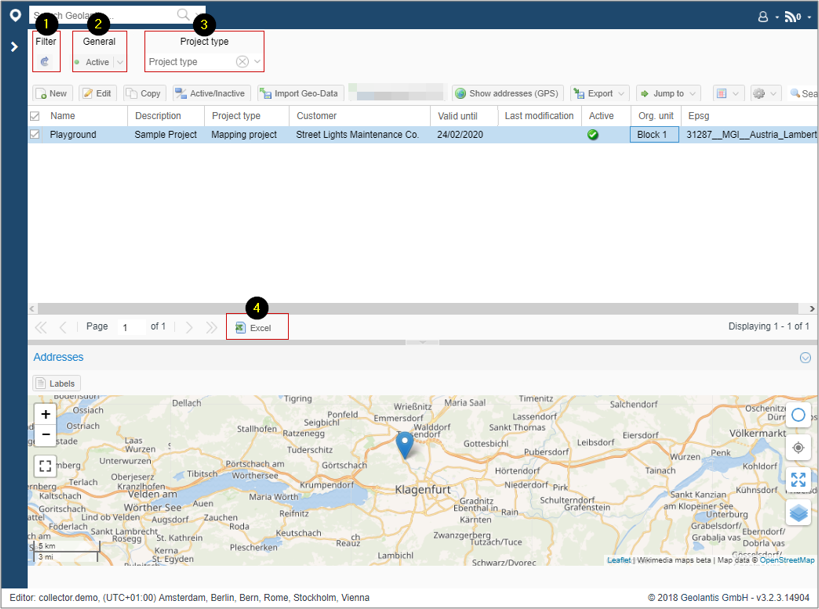
Filtering Projects List
Listed projects in Projects page can be filtered according to multiple filter options. Filters can be adjusted from the upper menu as follows:
- Click the reload button to apply selected filters
- Filter project list by project Status (active/inactive/all)
- Filter project list by certain Project Type
- Export Project list to Excel file
Importing Project Geo-Data
For uploading external maps, projects can be imported to Geolantis.360 from variant spatial data formats. In Projects page, use the import tool to drag and drop files containing geo-data such as:
- ESRI Shapefile (zipped folder)
- AutoCAD DXF
- AutoCAD DWG
- CSV
- Exif
Imported geo-data can be configured as base maps to be used as reference networks for field workers. Basemap data will be loaded after 24 hours, and can be displayed only starting from zoom level 18.
Importing Project Geo-Data Step by Step
a) Go to Projects page and click on the „Import Geodata“ button

b) Use the mouse to drag & drop files, or click on the import window to open the file browser
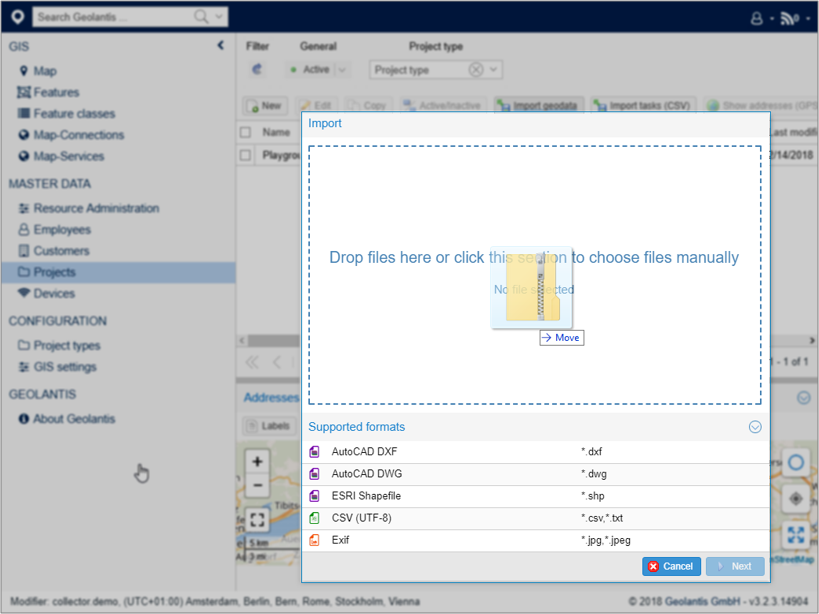
c) When the import file type is automatically detected, configure import General settings as follows:
- Select an existing project or create new
- Choose Feature class category where the imported data will belong to. Check „Import as General Base Map“ to import data as read-only (reference networks)
- Choose import mode. Select „Append“ to add imported data in addition to other project data if existing. Choose „Overwrite“ to replace data if existing.
- Click next

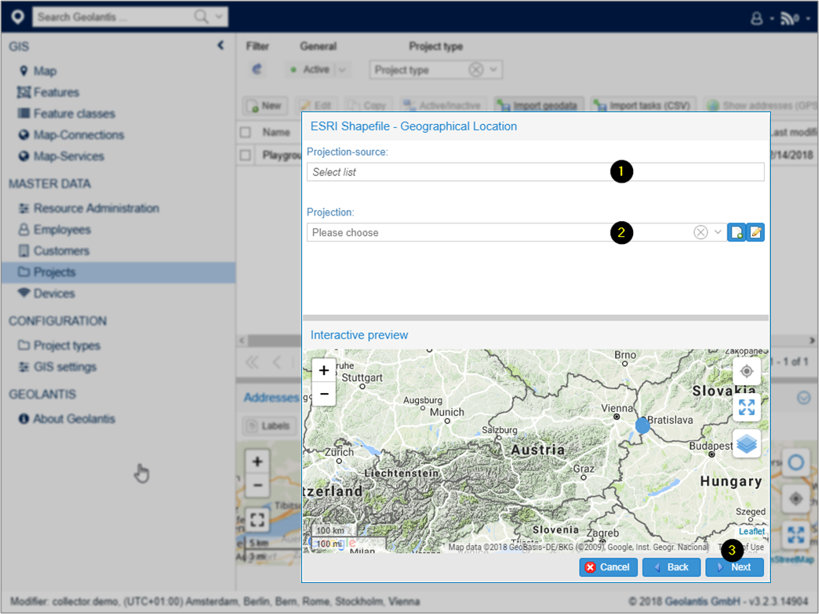
d) Configure Geographical Location settings
- Select the local file projection from the list if the imported file is projected
- Select standard EPSG profile if the imported file is NOT projected
- Click Next
e) Define Attributes and Structure settings
- Choose relative rotation field if exists in the source file (valid for point data)
- In file column shows existing attributes in the source file
- Use „In category“ column to determine which attributes to include/exclude
- Check „As select list“ if the equivalent field in source file has multiple values
- Click Next

f) Define features Coverage settings
Use the features attribute filter to import certain features and click Import.
g) Wait until the imported data is loaded successfully
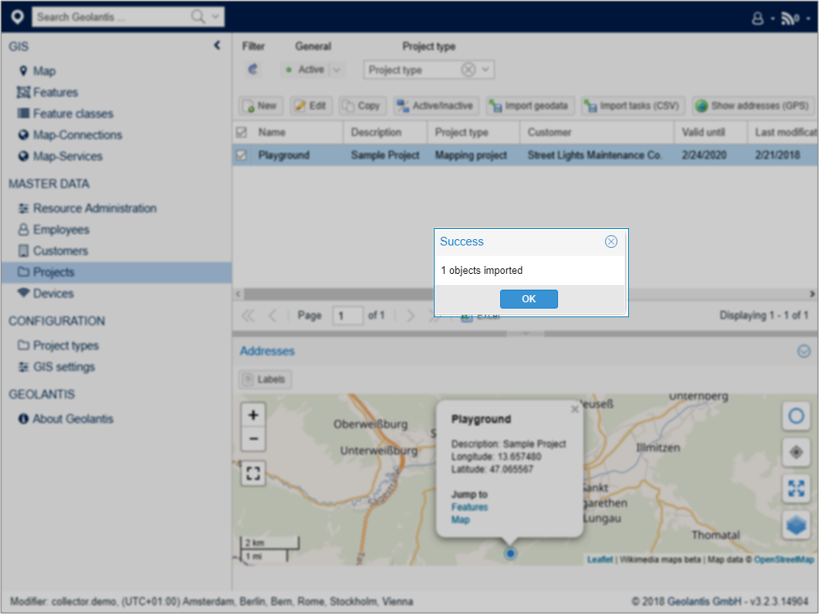
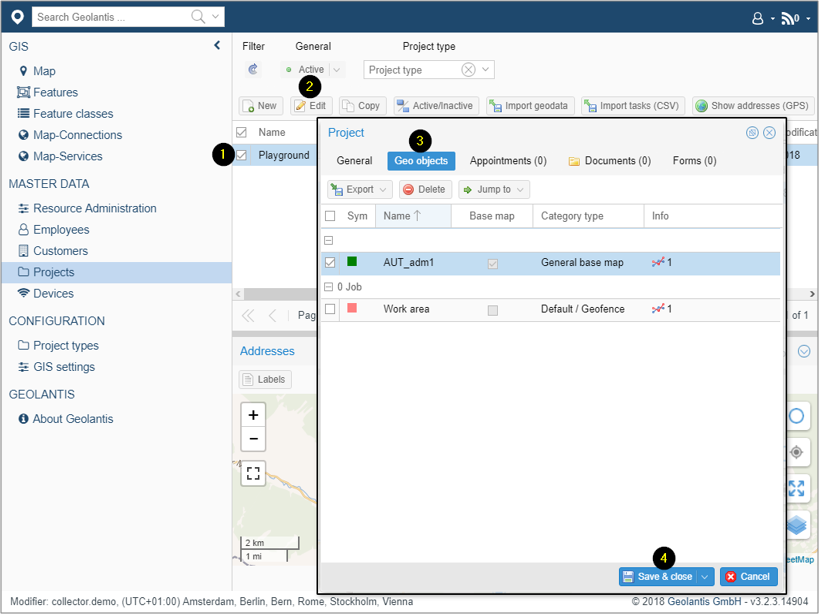
h) Review the imported project geo-data*
- Select Project
- Click Edit
- In the Project details window, switch to „Geo Objects“ tab, where selected features can be exported, deleted, or displayed in Features Page or Map page
- Save and Close
* Only active projects can be accessed in the mobile field app
** Go to Features page for viewing geo-data in Geolantis.360