Checklists overview
Checklists are one of the most dynamic attribute types in Geolantis.360 which can be utilized in smart forms, they define a list of questions or procedure checks that might be required for submitting a task by field workers to project managers or supervisors. The authorized managers in Geolantis.360 can create and customize checklists from the Checklist Management page under the Configuration section in Geolantis.360 web portal.
Managing checklists
Geolantis.360 offers multiple standard checklist templates that can be used instantly when needed. Depending on the purpose of the field job, existing checklists can be adapted, and new fully customized checklists can be created as well.
Use any of the existing checklist templates, or create new checklists as follows:
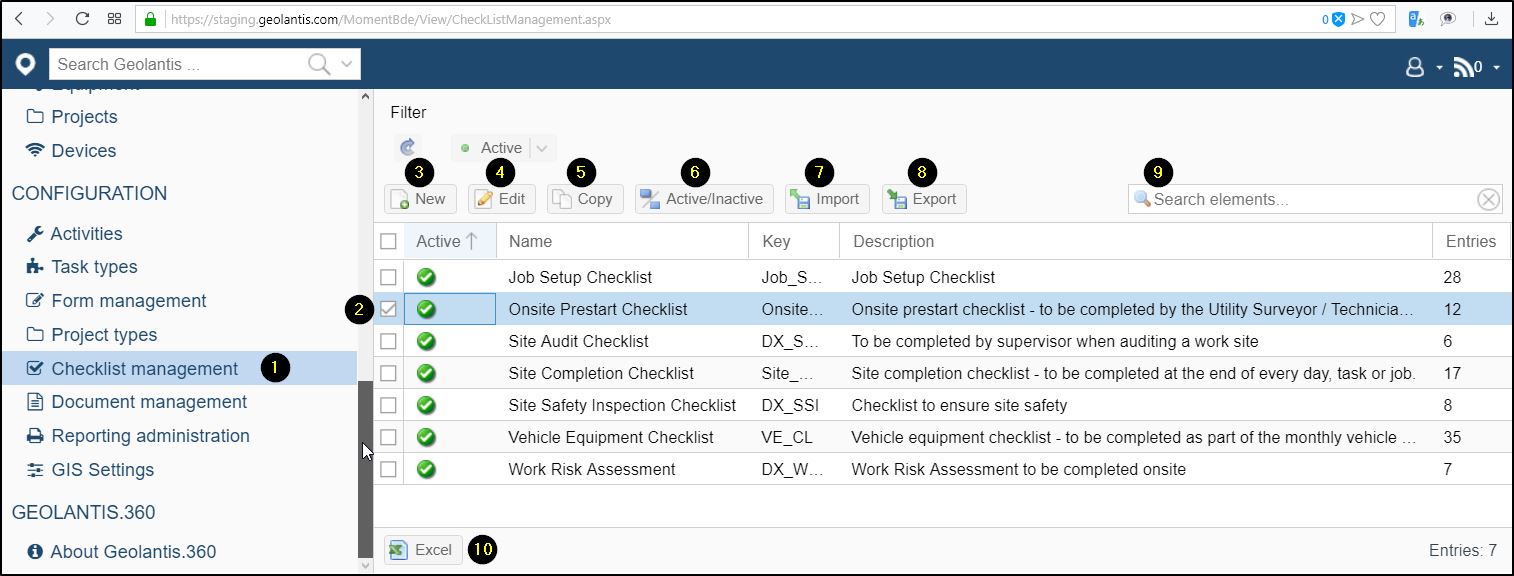
- Go to the Checklist Management page
- Select one of the existing checklists to edit or copy
- Click on New to create a customized checklist
- Click on Edit to adapt the checklist
- Click on Copy to duplicate and customize a checklist
- Click on Activate/Inactive to set a selected checklist as Active or Inactive(use the Active/Inactive/All filter on the top and click the filter reload button to display checklists in different visibility status)
- Click on Import to import single or multiple checklists from an external XML file that has been exported previously from Geolantis.360
- Click on Export to export single or multiple selected checklists to an XML file
- Use the Search bar to find a specific checklist by name. Search results will appear only after typing at least three characters
- Click on Excel to export a list of the displayed checklist entities to an excel file
Checklist Setup
Each checklist can have specific entries. Those entries can be configured when creating a new checklist or when editing an existing checklist.
The following description shows how to set up entries in the Checklist Edit window:
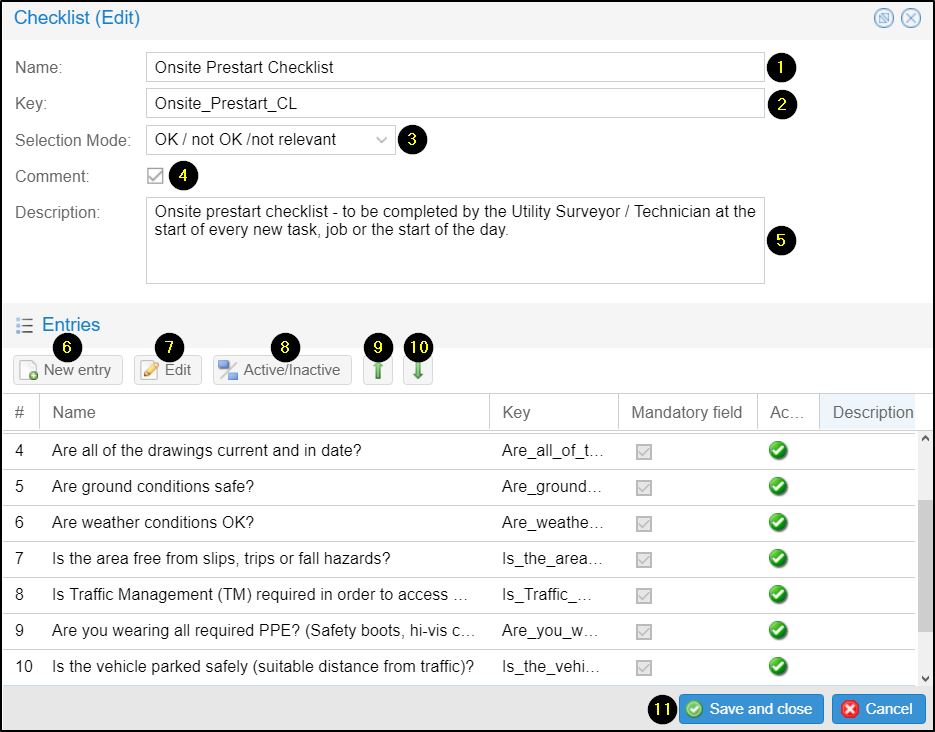
- Define a name of the checklist
- If the key value is not automatically generated, define a unique key value of the checklist. The key value is used to fetch data for reporting purposes.
- Choose a proper answer mode to the checklist entries. Checklists can be answered by [OK/Not Chosen], [OK/Not OK/Not Chosen], [OK/Not OK/Not Relevant], or [Numerical Checklist]. When choosing the mode [Numerical Checklist], it is possible to specify a default value or the minimum and maximum limits.
- Tick the Comment check-box to enable writing additional comments after answering the checklist entries
- Provide a brief description of the purpose of the checklist
- Click on New Entry to add checklist items
- Click on Edit to modify checklist entries
- Click on Activate/Inactive to show or hide a selected checklist entry
- Use the Up Arrow to move entries from the bottom to the top of the checklist
- Use the Down Arrow to move checklist entries from the top to the bottom of the checklist
- Save the checklist setup
Benefits of using checklists
When using checklists, there is no need to repeat all entries configuration from one form to another. After creating and saving checklists, they can be utilized as an attribute type within the Attribute Editor in the following forms:
How to configure a checklist in the attribute editor?
The following example shows how to configure a checklist attribute within a standard form. In this example, the field workers are asked to fill-out a Site Inspection form including a risk assessment checklist when they visit the site of a survey job.
The risk assessment checklist can be included in a form as follows:
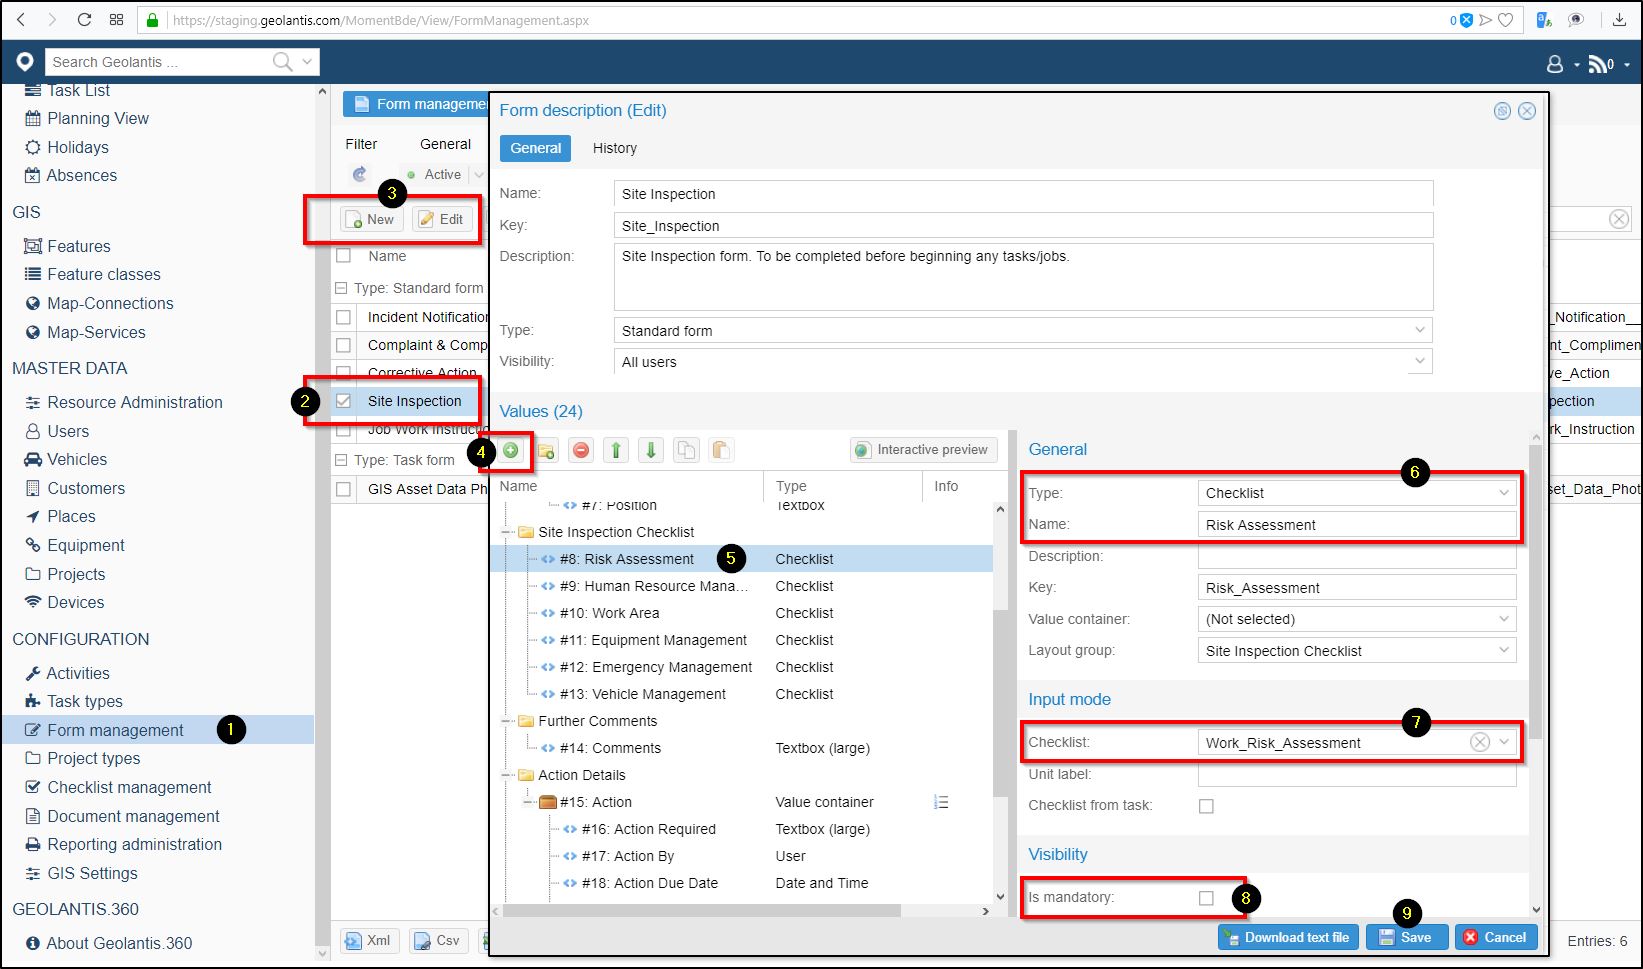
- Go to the Form Management page
- Select the form Site Inspection
- Click on Edit , or create a new form if the form does not exist
- In the Form Description (Edit) window, find the Values section and click on Add
- Click on the new value line
- In the General parameters section, choose ‘Checklist’ as Type and define the desired attribute name
- In the Input Mode section, select the required checklist from the list (for example, choose the created Work Risk Assessment checklist)
- Optional: In the Visibility section, tick the Is Mandatory check-box to force filling-out the checklist by the field users
- Save the form
Using checklists in the Geolantis.360 mobile field app
Checklists can be accessed on Geolantis.360 mobile app through the Forms module as follows:
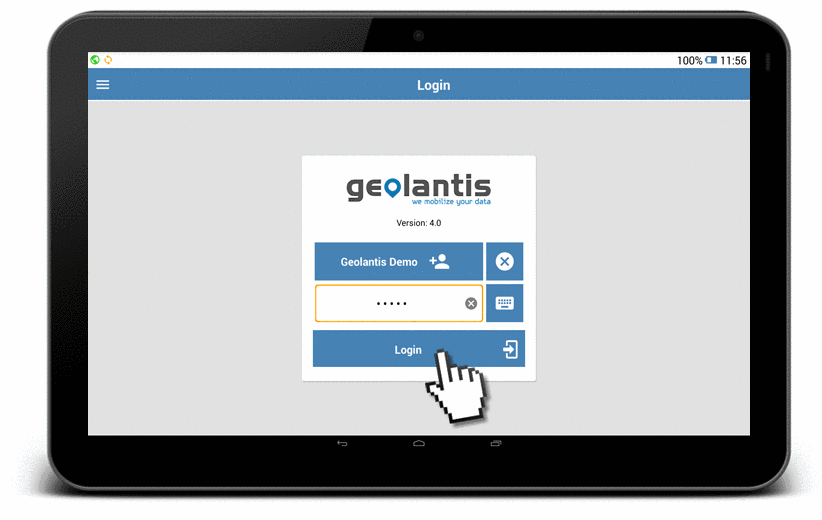
- Login
- Go to the Forms module
- Find the form where the required checklist is incorporated (for example, the form ‘Site Inspection’ includes the checklist ‘Risk Assessment’)
- Fill out the checklist values (depending on the checklist mode, the options to answer the checklist entries may look different)
- Save the checklist
- Finish the form